How to Insulate Your Garage Doors [Practical Guide]
October 30, 2017
Holiday Security Checklist for the Home & Garage
December 15, 2017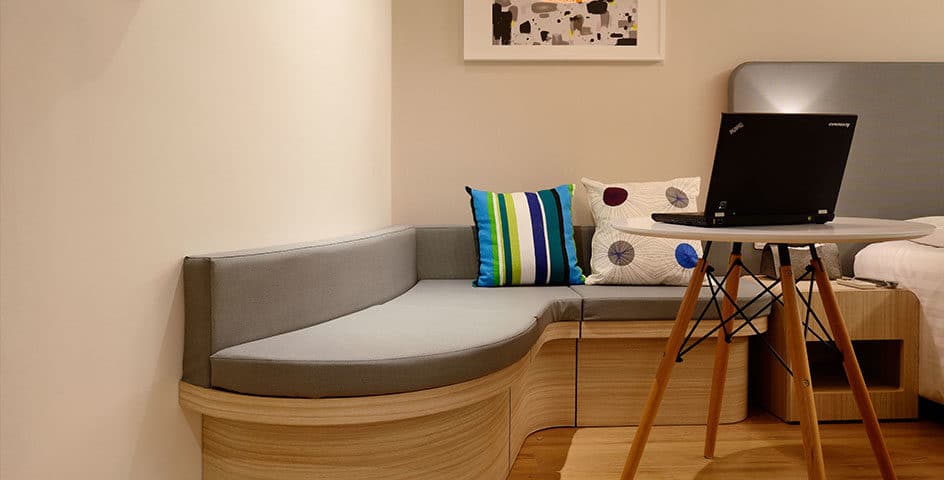
Steps to turn your garage into an apartment
Consider one of the following scenarios:
Scenario 1: Your parents have become frail and need to stay with you.
Scenario 2: After finishing his studies your son needs to live with you for an undefined amount of time until he earns a better salary.
Scenario 3: You live in a popular neighbourhood and could earn something extra by renting out a room.
In all of the above scenarios, privacy is important, not only for the person/s living with you but also for you. The garage is one of the most spacious rooms in the house and could accommodate an open-plan kitchen, lounge, bedroom and bathroom all in one. With a revamp it could become the perfect granny flat, bachelor pad or Airbnb listing.
After gaining the necessary approvals turn your garage into an apartment by following the following steps:
Step 1: Plumbing & electricsWith privacy in mind, it is essential for the apartment to have its own water and electrical points. Unless you are a contractor, or Mr/Mrs DIY it is perhaps best to get a contractor out to do all the plumbing and electric work for the project. On the plumbing side of things the apartment will need at least two basins. It will also need a toilet and a shower. One or two plug points will be sufficient.
Step 2: Add a window and doorNatural light is essential in creating a homey feel in the garage space. Achieve this through adding windows. And while you are breaking holes into the garage, add a door. Even though there might be a door into the living room or kitchen of your house already, your guests need to come and go as they please. Don’t forget the burglar proofing.
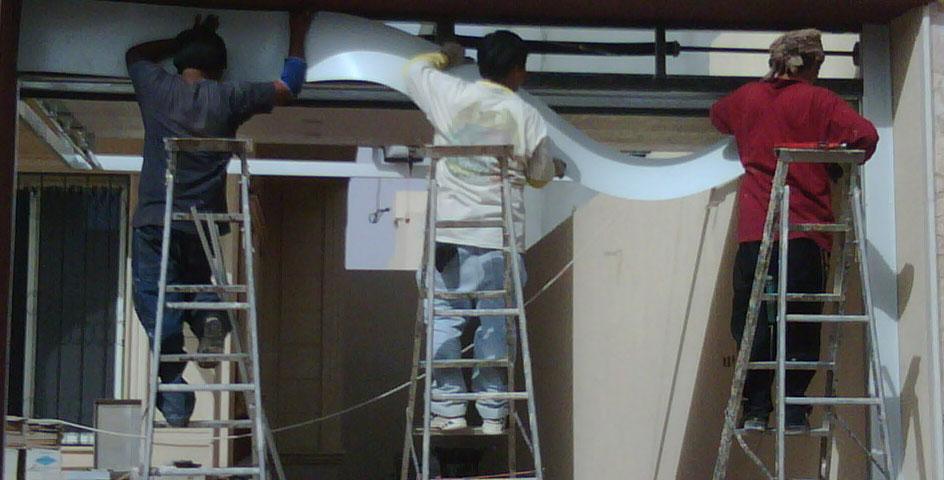
Step 3: Insulate itThere is a good reason why your garage is the hottest room in summer and the coldest in winter. It needs to be insulated. First, the garage door, then the ceiling and walls.
Step 4: Floors & wallsTransform the space even further by plastering the walls and painting it a homey colour. Square off a corner of the garage with drywalls and a type of sliding door as a bathroom. Alternatively, you can add a piece of drywall so that the toilet isn’t immediately noticeable from any of the doors. For the floors the world is your oyster. Either tile it or add laminated or vinyl flooring, even carpets will create the look you want.
Step 5: Cover the garage doorEven with steps 1 to 4 done and dusted, the appearance of the garage door on the inside will jeopardise the whole “apartment” look. Make a plan to cover it. Drywalls could be a good idea because you can paint it the same colour as the rest of the “apartment”.
Other additions that could make all the difference:- Tile the bathroom walls
- Add built-in cupboards in the kitchen and bedroom.
- Add a countertop in the kitchen.
- Remove the fluorescent light and instead make use of two or three smaller lights, with warmer lighting, in strategic places.
- Add a ceiling fan.
- Decorate with curtains, wall hangings and scatter cushions.